Hey i tried to change my background on here and it has totally messed up all the formatting I had saved on here on ALL of my posts!!!!!! SOOOOO FRUSTRATING!!!
So I am trying to clean them up right now. Be back soon, I am looking for a new job too :(
Dec 9, 2009
Oct 17, 2009
Finally She POsts SoMething
I am sure none of you have been waiting for another post, but just in case I am making up for my recent absence by posting some of the the best recipes I've been dilly dallying with this fall. I have been hibernating and gathering chanterelles on the weekends. Now my husband has a cold and we are stuck inside because of the rain we are finally getting so I have time to post something.
Drain the pickled beets saving the juice in case you have any extra. To prepare cheese spread, combine goat cheese, mayonnaise, tarragon, 1/8 teaspoon pepper, and garlic in a small bowl. Spread each baguette slice with 1 teaspoon cheese mixture; top with 3 slightly overlapping slices of beet.
Nutritional Information Calories:127 (27% from fat) Fat:3.8g (sat 2g,mono 0.9g,poly 0.3g) Protein:5.2g Carbohydrate:18g Fiber:1.4g

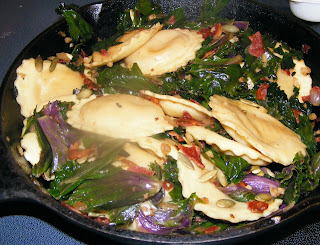
In a large skillet cook bacon until crisp and place on paper towels. Boil a large pot of water and add chopped kale and salt to the water. Then add ravioli. Drain, making sure you save a cup of the water from the pan. Meanwhile in the skillet add oil then add shallot and garlic. Cook about 1-2 minutes stirring. Toss in the pumpkin seeds and sage, stir for 30 seconds. Add kale and cook, stirring to coat with shallot mix, sprinkle on pepper. Add ravioli and some pasta water, cook stirring constantly for about a minute. Use more water to thin out if needed, and before serving crumble bacon into the dish and stir to combine. Sprinkle with fresh grated parmesan.
Beet & Goat Cheese Crostini
I adapted this from a Cooking Light recipe and instead of making fresh pickled beets, I buy a jar of nice ones from the store to save time and work. These are so garlicky and delicious. We used our garlic from the garden.
Yield 12 servings (serving size: 2 crostini)
1 jar organic pickled beets
1 (5-ounce) package goat cheese
1 tablespoon light mayonnaise
2 teaspoons minced fresh tarragon
1/8 teaspoon freshly ground black pepper
1 garlic clove, crushed
24 (1/2-inch-thick) slices diagonally cut French bread baguette, toasted
Nutritional Information Calories:127 (27% from fat) Fat:3.8g (sat 2g,mono 0.9g,poly 0.3g) Protein:5.2g Carbohydrate:18g Fiber:1.4g

Cashew Potato Leek Soup
This is a vegan soup that my husband now prefers to a previous version of potato soup I used to make. It is very basic and the apple is not noticeable in the soup, the cashew lends a thick creaminess to the texture. We got this recipe from The Bold Vegetarian Chef  cookbook. We prefer to add chopped scallions to this on top of the soup before serving as well. I also use our handy stick blender to blend the cashews and soup.
3-4 leeks (white and green parts) coarsely chopped and well rinsed
2 Tbls olive oil
3 medium baking potatoes, peeled and cut into large chunks
6 cups vegetable broth or stock
1 tsp salt ¼ tsp
fresh pepper
1 cup unsalted cashews
about 1 cup apple juice
chopped fresh chives for garnish
1.Soften the leeks in olive oil over medium-low heat in a covered soup pot without allowing them to brown, about 5 minutes. Stir occasionally. Add the potatoes, stock, salt and pepper. Bring to a boil. Reduce the heat and cook for 30 minutes or until the potatoes are very soft.
2.While the soup is cooking, prepare the cashew cream by pureeing the cashews and apple juice in a blender until very creamy. Add more juice or water if the cream is too thick. Set aside in a small bowl or measuring cup and rinse out the blender.
3.In small batches, ladle roughly equal amounts of potatoes, leeks, and stock into a blender or a food processor. Puree until very smooth. Serve warm or reheat. 4.Decorate the soup with the cashew cream or blend it in entirely. (It’s completely up to you how you want to do this). Top with chopped chives.

Pan Roasted Chicken with Leeks & Chanterelles
This is a recipe I created from combining a couple recipes that I liked, but I liked different parts of them. It is one of our favorite ways to eat our chanterelles we forage in the fall. If you don't eat meat, try this with a tofu steak, tempeh, or faux meat product like Quorn (and sub in veggie broth). I served this with roasted brussels sprouts.
3 tablespoons all-purpose flour, divided
1/4 teaspoon salt
1/4 teaspoon freshly ground pepper
2 5-ounce boneless, skinless chicken breasts
1/2 teaspoon freshly ground pepper
1/4 teaspoon salt
1 tablespoon canola oil
1 medium shallot, minced
2 Tbls garlic, minced
1 cup chanterelle mushrooms, cut into thick slices
2 tablespoons dry vermouth, or dry white wine
1/4 cup reduced-sodium chicken broth
2 tablespoons half &half
2 tablespoons minced fresh chives, or scallion greens
1.Combine 2 tablespoons flour, salt and pepper in a shallow dish. Dredge chicken in the flour mixture. 2.Heat oil in a medium skillet over medium heat. Add the chicken and cook, turning once or twice and adjusting the heat to prevent burning, until brown and/or an instant-read thermometer inserted into the thickest part registers 165°F, 12 to 16 minutes. Transfer to a plate and tent with foil, or your toaster oven to keep warm.
3.Add shallot to the pan and cook, stirring, until fragrant, about 30 seconds. Add garlic and mushrooms; cook, stirring occasionally, until tender, about 2 minutes. Pour in vermouth (or wine); simmer until almost evaporated, scraping up any browned bits, about 1 minute. Pour in broth and cook until reduced by half, 1 to 2 minutes. Stir in cream and chives (or scallions); return to a simmer. Return the chicken to the pan, turn to coat with sauce and cook until heated through, about 1 minute.

Kale & Bacon with Butternut Squash Ravioli
I came up with this recipe because Costco has been selling this butternut squash ravioli that is not too bad on the waistline and very tasty. But it's hard to come up with anything else that tastes as good as serving it with brown butter and sage. So I made this last night with the intentions of stretching the ravioli and adding a bit of texture to the dish. The results were awesome and tasty. I might mess with it a bit more in the future but this is filling and serves at least 3 for dinner. We use kale from our garden, use any variety you prefer, or use swiss chard instead.
1 package Monterey Butternut Squash Ravioli
4 cups coarsely chopped kale
5 pieces turkey bacon (or pork, or none at all if you don't eat meat)
1 medium shallot, finely chopped
3 large cloves of garlic, minced
1/4 unsalted pumpkin seeds (pepitas)
2 Tbls fresh sage, finely chopped
salt & pepper
1 Tbls olive oil
fresh grated parmesan
Sep 3, 2009
Natural Curly Girls and Boys I have found the best DIY gel!
OK this is a long overdue post. I have been meaning to post about this for 2 weeks but just have been too busy. I don't know why I am so busy because I never seem to anticipate it. Anyway, been on ravelry talking in the Curly Girls group where we all share ideas and info on keeping our feisty curls under control and looking good. Everyone has been raving about flax seed gel that they have been making and using. I am so glad I paid attention because I was just saying to a friend that I would like to buy a product for styling that wasn't tested on animals or full of chemicals and/or alcohols. There are limited choices when you look for anything like that suited for curly hair. I admit, I was skeptical but I LOVE this gel and it has been making me look good for 2 weeks now.
There is also a chemist on the group who has given info on different things you can add to this to suit your particular needs. I've known that I can use some fresh ground flax as a sub for eggs in baking recipes but now I know why! Here is the recipe:
Flax Seed Hair Gel
1 cup water
1/4 cup whole flax seed

optional:
essential oil
epsom salts
Aloe Vera Gel

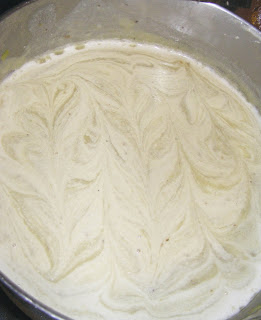
1. Pour 1 cup of water (not warm or hot - just cool from the tap) into my saucepan, then 1/4 cup of flax seeds and then turned the heat on high. Stir to keep the seeds moving and keep them from sticking to the bottom of the pan. 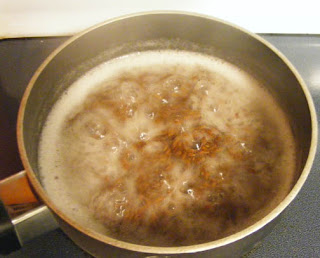

2. Once your water comes to a boil, stir frequently. When you start getting a gel consistency turn the heat down a little and keep stirring. Once seeds look suspended in the gel it is done cooking. Don't cook too long or you won't be able to strain it through the mesh strainer. ( If that does happen though, put a little more water in it and heat it up again, then repeat with straining.)

3.Then shut off the heat and pour the liquid and seeds into a fine mesh strainer over your bowl. There are several things you can add to your gel, some of which I consider a must. One this is Grapefruit Seed Extract. You can find this at health stores like GNC usually in small bottle that will last ages. This acts as a preservative to your gel.
Another thing is essential oils if you want to scent it. Some like rosemary or lavender oils. I added a premixed "nag champa" blend to mine, just a couple drops to scent it. Just make sure to check out if these oils you want in it aren't drying or harmful to skin in any way before you add it to your gel.
Another thing you can add is Aloe Vera Gel, the kind they sell in health stores for consumption. I have found that it adds a bit of moisture to the gel, so if you think your gel is drying, you can add up to Tablesoon and mix it in. I have found myself that i prefer less than that.
The last thing you may want to add is epsom salts, this activates your curls a bit to make sure they all look happy and uniformly curly. Be careful though and start small, add up to a tablespoon (or more after you have experimented for awhile). I think I will be using only a tsp in my own.
Just do not add any of these extras while cooking on the stove, only afterwards. Boiling breaks them down and destroys their scent and other properties.
Now you can store your gel in a bottle or jar. I put half in the fridge (to last longer) and half in an empty lotion jar I had washed out. I find that this is an egg white consistency, sort of gross like mucus! But I swear leaves no residue or color behind. In fact I have found that when I touch my hair too much and it gets messed up all I have to do is sprinkle a little water on it and it's fixed! I have tried it with a diffuser and without with the same results. I like to dip my fingers in it to coat them and then brush through my hair until I have enough. Be slightly liberal, don't worry about being to goopy. Let it dry with a diffuser or without and then scrunch it out to soften ( I am sure you all know the drill)
Sounds complicated, but the whole process takes me only about 6-8 minutes. Especially once you have done it it's much easier afterwards. Talk about inexpensive too! Now if you are too lazy and/or sleptical I know a person who makes and sells this flax gel on etsy. She gives you the option of many different additives and your own scent choices and is from my old stomping grounds, MN. But it will cost more, and I've heard that people prefer their at home version, even though it works well enough. I've also read that this is almost identical to Jessi Curls Rockin Ringlets gel which costs around 12 bucks a bottle. So if you want to try these in lieu of the DIY that is your way to go.
I know! DIY gel! who knew? ha ha.
Aug 10, 2009
Crispity Crunchity Blueberries.....
I ended up with quite a few blueberries again this year and because I still have a surplus of blueberry jam from last year's harvest, I decided to make a dessert. I was in a fit of munchies and grabbed my "Passionate Vegetarian

Blueberry Crisp (from the Passionate Vegetarian Cookbook)
Serves 6 to 8 amply
8 cups fresh blueberries, rinsed and picked over
1/4 cup honey
1/4 cup unbleached white all-purpose flour
1/4 butter, softened
2/3 cup brown sugar
1 tsp vanilla extract
1 cup rolled oats (regular cooking oatmeal)
1/2 cup whole wheat flour 1/8 tsp ground cinnamon
2 TBLS to 1/4 cup walnuts or pecans, chopped after measuring(optional)
Cooking spray
1.Preheat oven to 375 degrees
2.Spray an 11 x 14 inch baking dish with cooking spray, set aside.
3.Toss the blueberries, honey, and white flour together in a medium bowl; then put your hand in and squeeze one fistful of blueberries to release the juices. Toss again. Place the blueberry mixture in the prepared baking dish.
4.Combine butter and brown sugar in a food processor, first pulsing to blend, then buzz to combine, pausing to scrape down the sides of the bowl. Add the vanilla. Add the oatmeal and pulse, pausing to scrape the sides of the bowl, until the oats are slightly chopped but not completely powdered. 5.Transfer to the bowl. Add the whole-wheat flour and cinnamon, blending with a spoon to make a crumbly mixture over the blueberries. Bake until the blueberry juices are thickened and bubbling and the top is crisp & brown, 35 to 40 min. This is MINE bubbling in the oven! now go make your own !

Jul 30, 2009
The "Dog Days" of Summer
Here in WA we've had record breaking temps. It's been miserably hot for us PNW peeps and likely even more so for our furry pets. I have 3 dogs, one who is quite fuzzy and having a hard time in this heat. For a nice cool treat in the summer, I like to buy some organic low-sodium chicken broth (or beef if you prefer) and freeze it in ice cube trays, then store them in a container. The dogs LOVE these and they gobble them up which makes me feel like they are getting more liquids and nice treat they enjoy. We've labled one of our ice cube trays with "C" in permanent marker so that we know that's the chicken tray for the dogs and nothing else. But this isn't necessary.
Another ice cold treat I've made for my dogs are these really great yogurt ice cubes that I found the recipe for in Modern Dog magazine last year. They really like these as well, but they are a teensy bit more time consuming than the broth version. Either one I am sure will get your pups attention. Try it! And if your pets really like them and you want to have a bit more fun, then get one these
 and freeze them in it.
1 large container of plain yogurt or vanilla yogurt (1 litre/32 ounces)
1 ripe banana
2 tablespoons peanut butter, with no added salt or sugar
2 tablespoons honey
Blend ingredients, using a food processor or blender. Freeze in ice cube trays, and then transfer to Ziploc freezer bags, for easy storage. A large measuring cup, makes filling trays, cups, or molds, very easy. Frosty Paws are great for teething puppies.
On another note let's not forget that we don't want to cook in the house when it's this hot outside! Because where I live, most of us don't have air conditioning so when it's this hot (which is usually not often, with the exception of this summer) you don't even want to cook something on the stove let alone in the oven. I've been making this recipe for a few years now, and I have to admit the first time I made them I wasn't so sure about these pieces of plain tofu in the wraps. I don't mind tofu mixed into recipes, usually cooked, but plain and cold? not usually what I want. Well, I learned my lesson cause these are SO delicious and perfect for hot summer nights or days. You don't even notice the tofu with all the other textures going on in these wraps. My husband even loves these as much as I, which is even more unusual for him considering the tofu factor I mentioned before.
I usually skip the peanuts, but if you want them throw them in there. Try them, I swear you will probably like them a lot if you like any kind of Asian lettuce wraps, the sauce is outrageously good, and if the kids don't want the tofu, they can skip that part. There's still plenty of good stuff in them.
Vegetable and Tofu Lettuce Wraps with Miso Sambal
In this appetizer, the fresh flavors of the vegetables come alive with the spicy, gingery sambal. This popular Indonesian condiment takes on many variations of the basic combination of chiles, brown sugar, and salt. Prepare a double batch, and serve the extra with fish. The creamy texture of the avocado pieces and tofu slices are a pleasant contrast to the crisp vegetables.
Miso sambal:
2 tablespoons chile paste with garlic (such as Sambal oelek)
2 tablespoons chopped peeled fresh ginger
2 tablespoons white miso (soybean paste)
2 tablespoons rice wine vinegar
1 1/2 tablespoons sugar
1 1/2 teaspoons dark sesame oil
Wraps:
1 cup matchstick-cut English cucumber
1/2 cup cilantro sprigs
2 tablespoons chopped dry-roasted peanuts
1 (12.3-ounce) package reduced-fat firm tofu, drained and cut into 1/2-inch-thick strips
1/2 avocado, peeled and thinly sliced
12 large Boston lettuce leaves
To prepare miso sambal, combine the first 6 ingredients in a blender, and process until smooth. To prepare wraps, divide cucumber, cilantro, peanuts, tofu, and avocado evenly among lettuce leaves. Drizzle each with about 1 1/2 teaspoons sambal; roll up.
Yield: 6 servings (serving size: 2 wraps) CALORIES 106 (51% from fat); FAT 6g (sat 0.9g,mono 2.9g,poly 1.5g); IRON 1.1mg; CHOLESTEROL 0.0mg; CALCIUM 27mg; CARBOHYDRATE 8.5g; SODIUM 261mg; PROTEIN 5.5g; FIBER 1.5g Cooking Light, NOVEMBER 2005
****NOTE I like to experiment with this recipe a little, like trying other veggies in them. I add shredded carrots almost every time, once I sliced fresh snap peas and threw them in the wraps too. Both are great with these!
Another ice cold treat I've made for my dogs are these really great yogurt ice cubes that I found the recipe for in Modern Dog magazine
1 large container of plain yogurt or vanilla yogurt (1 litre/32 ounces)
1 ripe banana
2 tablespoons peanut butter, with no added salt or sugar
2 tablespoons honey
Blend ingredients, using a food processor or blender. Freeze in ice cube trays, and then transfer to Ziploc freezer bags, for easy storage. A large measuring cup, makes filling trays, cups, or molds, very easy. Frosty Paws are great for teething puppies.
On another note let's not forget that we don't want to cook in the house when it's this hot outside! Because where I live, most of us don't have air conditioning so when it's this hot (which is usually not often, with the exception of this summer) you don't even want to cook something on the stove let alone in the oven. I've been making this recipe for a few years now, and I have to admit the first time I made them I wasn't so sure about these pieces of plain tofu in the wraps. I don't mind tofu mixed into recipes, usually cooked, but plain and cold? not usually what I want. Well, I learned my lesson cause these are SO delicious and perfect for hot summer nights or days. You don't even notice the tofu with all the other textures going on in these wraps. My husband even loves these as much as I, which is even more unusual for him considering the tofu factor I mentioned before.
I usually skip the peanuts, but if you want them throw them in there. Try them, I swear you will probably like them a lot if you like any kind of Asian lettuce wraps, the sauce is outrageously good, and if the kids don't want the tofu, they can skip that part. There's still plenty of good stuff in them.
Vegetable and Tofu Lettuce Wraps with Miso Sambal
In this appetizer, the fresh flavors of the vegetables come alive with the spicy, gingery sambal. This popular Indonesian condiment takes on many variations of the basic combination of chiles, brown sugar, and salt. Prepare a double batch, and serve the extra with fish. The creamy texture of the avocado pieces and tofu slices are a pleasant contrast to the crisp vegetables.
Miso sambal:
2 tablespoons chile paste with garlic (such as Sambal oelek)
2 tablespoons chopped peeled fresh ginger
2 tablespoons white miso (soybean paste)
2 tablespoons rice wine vinegar
1 1/2 tablespoons sugar
1 1/2 teaspoons dark sesame oil
Wraps:
1 cup matchstick-cut English cucumber
1/2 cup cilantro sprigs
2 tablespoons chopped dry-roasted peanuts
1 (12.3-ounce) package reduced-fat firm tofu, drained and cut into 1/2-inch-thick strips
1/2 avocado, peeled and thinly sliced
12 large Boston lettuce leaves
To prepare miso sambal, combine the first 6 ingredients in a blender, and process until smooth. To prepare wraps, divide cucumber, cilantro, peanuts, tofu, and avocado evenly among lettuce leaves. Drizzle each with about 1 1/2 teaspoons sambal; roll up.
Yield: 6 servings (serving size: 2 wraps) CALORIES 106 (51% from fat); FAT 6g (sat 0.9g,mono 2.9g,poly 1.5g); IRON 1.1mg; CHOLESTEROL 0.0mg; CALCIUM 27mg; CARBOHYDRATE 8.5g; SODIUM 261mg; PROTEIN 5.5g; FIBER 1.5g Cooking Light
****NOTE I like to experiment with this recipe a little, like trying other veggies in them. I add shredded carrots almost every time, once I sliced fresh snap peas and threw them in the wraps too. Both are great with these!
Jul 23, 2009
Cleaning my Disgusting Refrigerator, the natural way
OK, being a chef at home has many perks for my husband and my dogs... and my friends.. ha ha but one of the not good things is that my fridge is a mess. I hate to clean and after hours of cooking the last thing I want to do is clean the fridge. My husband is fairly lazy about cleaning things himself and he seems to think the kitchen is my domain so he is afraid to throw anything away. This leads to many things lurking in the corners of our fridge for a long time and then the other stuff that drips, sticks and floats around in there after time... well you get the idea, it's not pretty. Not pretty at all.
I've been procrastinating cleaning it, or I should say WE have been but a recent email from the Gorgeously Green guru with a recipe for a natural fridge cleaner motivated me (and if you sign up on her page you get a weekly recipe too!) . I just happened to have the ingredients in my home, but they are surely not hard to find for most people. What i found interesting was that the oils together smelled very similar to pinesol! It was so funny to me, but not as strong smelling and the smell does not linger after you done cleaning.
The other thing is that after 3 hours of cleaning the fridge with this stuff, my husband doesn't recognize our fridge. He said "it's bright and I can't find anything" because so much stuff got tossed, recycled, etc... our fridge is now user friendly to outside world. So I can say with great confidence that this stuff rocks and you should try it. I think they included the tea tree because of the antiseptic properties and I am not sure why the grapefruit is there except on a hunch that it also has them. Either way, try it out, I think you will be very pleased as I was.
FRIDGE CLEANER
1 cup white vinegar
1 cup warm water
1 tbsp baking soda
10 drops grapefruit essential oil *
*
10 drops tea tree oil
In a large 4-cup measuring jug, combine all ingredients. Simply dip a rag into the fridge cleaner, wring it out and get to work wiping out all those nooks and crannies.
*You will be able to find these essential oils at most health food stores, or you can order excellent oils from http://m1e.net/c?87069779-RmUPGNYGCCJfw%404289599-6IVX3PuBIhvhE
Jul 2, 2009
OK! OKAY!!!
So.....I've been neglecting this place lately. Got too busy in the garden this spring and let it slip....as my etsy stores are closing soon (really they will) I am thinking of transitioning this blog into something of a gardening/cooking/ adventuring blog with a few eco-friendly snippets here and there.... but we'll see I am not making any commitments at this point and I am sure no one is waiting with baited breath or anything fancy like that.....
Mar 9, 2009
My Pre- St. Pattys Day Feast with Friends

This past weekend my husband and I were invited to a friend's place for a St. Patty's Day feast. Because we can't wait for the planets to align to have our schedules line up we had it early. This works out perfectly for you all who have something similar to attend because I have several new recipes for you that will impress anyone. I was told to bring dessert and I had one idea for bread pudding but that isn't always a kid favorite, so I made an additional dessert just in case. Besides that, i wanted to take the opportunity to try making some Irish Soda bread. Good thing too, cause it was delicious!

Besides dessert, I was bringing a hat I knit for their baby son Caiden and I wanted to bring something else for their older son Cedar, who is 7 years old so he wouldn't feel left out of the "gifts." He is fascinated with pirates due to the Pirates of Carribbean madness and so I came up with a 4 leaf clover eye patch for him! I wasn't sure if he would like it, but hey, it's simple and fun. He did like it too, I also made one for his dad so they could match. It was very simple, i cut a 4 leaf clover out of some green felt and sewed it onto some thin elastic, voila! Irish pirate.

So this is the first recipe for you. It's a recipe for the traditional Irish soda bread. I've only changed one thing, i added half chopped dates/chopped figs and half raisins instead of all raisins in this bread. I think either way would be delicious. It's very easy, no rising time required. I never made soda bread before, it's a little sweet but not so sweet like a dessert bread. It's dense, moist and surprisingly good!
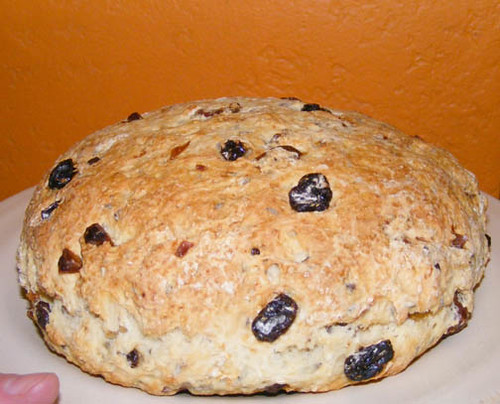
Helen Doyle's Irish Soda Bread
3 cups all-purpose flour
1 cup raisins
1/4 cup sugar
1 tablespoon caraway seeds
2 teaspoons baking powder
1 teaspoon salt
1/2 teaspoon baking soda
1 1/2 cups nonfat buttermilk
Vegetable cooking spray
Combine first 7 ingredients in a large bowl; stir well. Add buttermilk; stir well until a dough forms. Turn dough out onto a lightly floured surface, and knead lightly 3 to 4 times. Pat dough into an 8-inch round cakepan coated with cooking spray. Bake at 350° for 45 minutes or until a wooden pick inserted in center comes out clean and bread is golden. Let cool in pan 5 minutes; loosen edges of bread with a knife. Remove from pan; let cool on a wire rack. Cut into wedges.
Yield: 12 servings CALORIES 171 (3% from fat); FAT 0.6g (sat 0.2g,mono 0.1g,poly 0.2g); IRON 1.7mg; CHOLESTEROL 1mg; CALCIUM 81mg; CARBOHYDRATE 37.6g; SODIUM 264mg; PROTEIN 4.6g; FIBER 1.5g Cooking Light
The second recipe is for Irish Cream Brownies. These are basically regular brownies with some Irish Cream flavor. It's not very strong and tastes delicious, I added double the amount and could just taste it a little bit. This recipe says it make 16 servings, but seriously those would be some tiny brownies. I would cut into 12 servings at most. These are chewy and delicious.

Irish Cream Brownies
For truly fudgy treats, be sure to cook the brownies until a wooden pick inserted in the center comes out almost clean. If you wait until the pick is clean, the brownies will be overcooked. Garnish the plate with a sprig of mint.
1 cup all-purpose flour (about 4 1/2 ounces)
1/2 cup unsweetened cocoa
1/4 teaspoon baking soda
1/4 teaspoon salt
1/3 cup semisweet chocolate chips
1/4 cup butter
1 cup sugar
1/2 cup egg substitute
1/4 cup Baileys Irish Cream
1 teaspoon vanilla extract
Cooking spray
Preheat oven to 350°.
Lightly spoon flour into a dry measuring cup; level with a knife. Combine flour, cocoa, baking soda, and salt in a small bowl, stirring with a whisk.
Place the chocolate chips and the butter in a large microwave-safe bowl. Microwave at HIGH 1 1/2 minutes or until the chocolate chips and butter melt, stirring every 30 seconds. Cool slightly. Add sugar and next 3 ingredients (through vanilla extract), stirring well with a whisk. Microwave at HIGH 1 minute or until sugar dissolves, stirring every 30 seconds. Fold in the flour mixture, stirring just until moist. Spread batter in a thin layer into a 9-inch square baking pan coated with cooking spray. Bake at 350° for 20 minutes or until a wooden pick inserted in center comes out almost clean. Cool on a wire rack.
The last, most awesome dessert is Irish Whiskey Bread Pudding w/ Caramel- Whiskey Sauce. I must say I've never made bread pudding before, but I should have long ago! This dessert was so outrageously yummy I can't believe it. My hosts were raving about it saying this was one of their top 2 favorite desserts of all time. Don't skip the sauce, it makes the dessert. Though I will warn you to watch it and don't stir it just like the directions say after the sugar dissolves. I stirred it and it solidified in the pan! I had to make the sauce twice. Also I cooked it for less time on a lower temperature. Don't expect it to get thick like a store-bought caramel sauce cause it won't. But this taste is super duper yummy. I also added some dates in place of some raisins in the recipe. Sorry I didn't get a picture of this one, we ate it too fast! This recipe is based on a recipe from Cooking Light.
Irish Bread Pudding with Caramel-Whiskey Sauce
3 TBLS unsalted butter, melted
1 (10-ounce) French bread baguette, cut into 1-inch-thick slices
1/2 cup raisins (or chopped dates, figs)
1/4 cup whiskey
1 3/4 cups 1% low-fat milk
1 cup sugar
1 tablespoon vanilla extract
1 (12-ounce) can fat free evaporated skim milk
2 large eggs, lightly beaten
Cooking spray
1 tablespoon sugar
1 teaspoon ground
cinnamon Caramel-Whiskey Sauce (recipe follows below)
Preheat oven to 350°.
Brush melted butter on one side of French bread slices, and place bread, buttered sides up, on a baking sheet. Bake bread at 350° for 10 minutes or until lightly toasted. Cut bread into 1/2-inch cubes, and set aside.
Combine raisins and whiskey in a small bowl; cover and let stand 10 minutes or until soft (do not drain).
Combine 1% milk and next 4 ingredients (1% milk through eggs) in a large bowl; stir well with a whisk. Add bread cubes and raisin mixture, pressing gently to moisten; let stand 15 minutes. Spoon bread mixture into a 13 x 9-inch baking dish coated with cooking spray. Combine 1 tablespoon sugar and cinnamon; sprinkle over pudding. Bake at 350° for 35 minutes or until set. Serve warm with Caramel-Whiskey Sauce.
Caramel-Whiskey Sauce
1 cup sugar
2 cups water
1/4 cup whiskey
1/4 cup 1% milk
1/4 cup low-fat cream cheese (ricotta will work in a pinch)
3 TBLS butter
- Combine sugar and water in a small heavy saucepan over medium-high heat; cook until sugar dissolves, stirring constantly. Cook an additional 15 minutes or until golden (do not stir). Remove from heat. Carefully add butter and cream cheese, stirring constantly with a whisk (mixture will be hot and bubble vigorously). Cool slightly, and stir in whiskey and milk. Note: Substitute 1 tablespoon imitation rum extract and 3 tablespoons water for the Irish whiskey, if desired.
Our hosts, being Irish themselves (we do not have any Irish genes), wanted to make the traditional corned beef and cabbage. I don't eat beef so they were SO kind to make a veggie option for me. According to my husband though, the corned beef main dish was very good, and he's very picky! I don't have their recipe for that, but I do have the recipe for the soup they made for me to eat. Although I was not the only one eating it! I thought I should share it in case any of you have the same dilemma. Besides the meal we had Black and Tans to drink. We made them with Guinness and Rogue Kells Irish Lager. The lager was pretty good on it's own too!
Irish Colcannon and Thyme Leaf Soup
This soup reinterprets an Irish classic: colcannon, a dish of mashed potatoes and kale or cabbage. Garnish with extra thyme and black pepper.
2 tablespoons butter, divided
2 1/2 cups diced peeled baking potato (about 14 ounces)
1 cup diced onion (about 4 ounces)
1/2 teaspoon salt, divided
1/2 teaspoon freshly ground black pepper, divided
3 cups fat-free, less-sodium chicken broth (or veggie broth for vegetarians)
2 cups water
3 tablespoons water
8 cups thinly sliced savoy cabbage (about 1 pound)
1 tablespoon chopped fresh thyme leaves
Melt 1 tablespoon butter in a large saucepan over medium heat. Add potato, onion, 1/4 teaspoon salt, and 1/4 teaspoon pepper. Cover and cook 6 minutes. Add broth and 2 cups water; bring to a boil. Cook 10 minutes or until potato is tender.Combine 3 tablespoons water and remaining 1 tablespoon butter in a large Dutch oven; bring to a simmer. Add cabbage and thyme. Cover and cook 5 minutes, stirring occasionally. Remove from heat; stir in remaining 1/4 teaspoon salt and remaining 1/4 teaspoon pepper. Place half of potato mixture in blender. Remove center piece of blender lid (to allow steam to escape); secure blender lid on blender. Place a clean towel over opening in blender lid (to avoid splatters). Blend until smooth. Pour into a large bowl. Repeat procedure with remaining potato mixture. Add potato mixture to cabbage mixture; cook over medium-low heat until thoroughly heated.
Yield: 6 servings (serving size: 1 1/3 cups)
CALORIES 130 (28% from fat); FAT 4.1g (sat 2.5g,mono 1.1g,poly 0.3g); IRON 0.9mg; CHOLESTEROL 10mg; CALCIUM 48mg; CARBOHYDRATE 21g; SODIUM 442mg; PROTEIN 4.2g; FIBER 4.5g Cooking Light
, MARCH 2007Feb 20, 2009
The Chocolaty Spa Day at home
My friend said she tried the mask already and she loved it. She loves chocolate too of course. :)

By Janice Cox (of The Herb Companion Magazine )
)
Here’s some surprising news: Chocolate is good for your skin! Many of us grew up with the concept that chocolate causes blemishes. Instead, scientists now have discovered that chocolate can contain more antioxidants per cup than red wine or green tea. In fact, certain compounds in chocolate even help smooth the skin and decrease its sensitivity to the sun. Chocolate is good for your skin because of its high content of cocoa butter, which is a natural skin softener and conditioner. It is also an antioxidant, which means it prevents free radical damage to your skin and protects its natural elasticity. To receive the full benefit, choose commercial products or recipes with chocolate, cocoa and cocoa butter as the main ingredients. Also, dark chocolate seems to be much more effective than milk chocolate or white chocolate (which many argue is not really chocolate). Chocolate is considered dark if it contains at least 35 percent cocoa. In skin care, chocolate, cocoa and cocoa butter are all excellent moisturizers. Chocolate also contains caffeine which can stimulate your circulation and give your skin a healthy glow when used in a massage cream or body scrub. The scent of chocolate releases serotonin, the same hormone that we experience when falling in love and for many people promotes happy feelings and reduces stress. So next time you have a craving for something sweet, enjoy a bit of chocolate with the bonus of better skin and a better mood. Here are some cocoa-based recipes to create at home.
Chocolate from the Ground Up Chocolate is made from the seeds of the cacao tree. This tree is native to Central America and Mexico and dates back to 1100 b.c. The Mesoamerican people used the seeds to make beverages. The seeds are dried, cleaned and roasted to produce cacao nibs, which are ground and processed into two different substances: cocoa and cocoa butter. Chocolate as we know it combines these two components, along with other ingredients such as sugar, milk, and sometimes herbs and spices.
MOCHA FACIAL MASK
Makes 4 ounces, enough for 1 application
Facial masks are a great way to deep cleanse your skin so that it will work more efficiently. Plus, clean skin holds more moisture and looks brighter. The milk and espresso contain natural food acids that help rid your skin of surface debris and dead skin cells, while the chocolate or cocoa powder helps condition and soothe your complexion. Use weekly to wake up a dull complexion!
• 4 tablespoons finely ground espresso or coffee
•4 tablespoons cocoa powder
• 8 tablespoons whole milk
1. Mix together all ingredients until you have a smooth paste. 2. Spread over a clean face and neck, avoiding the eye and mouth area. 3. Let sit for 15 minutes and rinse well with warm water.
Chocolate Walnut Body Polish
Makes 8 ounces Exfoliate weekly with a body scrub for healthy, glowing skin. This rich recipe, full of natural nut oils, will gently scrub and soften the skin all over your body. In a pretty jar with a big bow, it also makes a wonderful gift. You can find walnut oil at the grocery store in the cooking oil section. You also might want to experiment with other natural nut oils, such as almond and macadamia
. • ½ cup raw sugar
• ¼ cup walnut oil
• 1 tablespoon finely chopped walnuts
• 1 tablespoon cocoa powder
1. Stir together all ingredients until well mixed.
2. Standing in the shower or tub, massage into damp skin, rinse well and pat dry HOT COCOA BATH
Makes 16 ounces, enough for 1 bath Milk baths are classic beauty basics. They are effective because the lactic acid in milk helps soften and soothe the skin. Chocolate milk is equally effective; combined with the power of honey, this yummy bath will refresh your skin. Be extra decadent and sip a cup of cocoa while bathing. It is especially relaxing in the evening before going to bed.
• 2 cups chocolate milk
• 1 tablespoon honey
• 2 tablespoons mild liquid soap
1. Stir together all ingredients.
2. Pour under the running water as you fill your tub.
3. Bathe and relax for 15 to 20 minutes
Chocolate Lip Balm Cocoa Butter Cuticle Cream Cocoa Mint Foot Scrub Chocolate Massage Butter
Janice Cox is the author of Natural Beauty at Home, Natural Beauty for All Seasons and Natural Beauty from the Garden, all published by Henry Holt and Company (New York). For more recipes and ideas, visit her at www.HerbCompanion.com/Contributors.
FULL ARTICLE LINK
Chocolate Spa Treatments
By Janice Cox (of The Herb Companion Magazine
Here’s some surprising news: Chocolate is good for your skin! Many of us grew up with the concept that chocolate causes blemishes. Instead, scientists now have discovered that chocolate can contain more antioxidants per cup than red wine or green tea. In fact, certain compounds in chocolate even help smooth the skin and decrease its sensitivity to the sun. Chocolate is good for your skin because of its high content of cocoa butter, which is a natural skin softener and conditioner. It is also an antioxidant, which means it prevents free radical damage to your skin and protects its natural elasticity. To receive the full benefit, choose commercial products or recipes with chocolate, cocoa and cocoa butter as the main ingredients. Also, dark chocolate seems to be much more effective than milk chocolate or white chocolate (which many argue is not really chocolate). Chocolate is considered dark if it contains at least 35 percent cocoa. In skin care, chocolate, cocoa and cocoa butter are all excellent moisturizers. Chocolate also contains caffeine which can stimulate your circulation and give your skin a healthy glow when used in a massage cream or body scrub. The scent of chocolate releases serotonin, the same hormone that we experience when falling in love and for many people promotes happy feelings and reduces stress. So next time you have a craving for something sweet, enjoy a bit of chocolate with the bonus of better skin and a better mood. Here are some cocoa-based recipes to create at home.
Chocolate from the Ground Up Chocolate is made from the seeds of the cacao tree. This tree is native to Central America and Mexico and dates back to 1100 b.c. The Mesoamerican people used the seeds to make beverages. The seeds are dried, cleaned and roasted to produce cacao nibs, which are ground and processed into two different substances: cocoa and cocoa butter. Chocolate as we know it combines these two components, along with other ingredients such as sugar, milk, and sometimes herbs and spices.
MOCHA FACIAL MASK
Makes 4 ounces, enough for 1 application
Facial masks are a great way to deep cleanse your skin so that it will work more efficiently. Plus, clean skin holds more moisture and looks brighter. The milk and espresso contain natural food acids that help rid your skin of surface debris and dead skin cells, while the chocolate or cocoa powder helps condition and soothe your complexion. Use weekly to wake up a dull complexion!
• 4 tablespoons finely ground espresso or coffee
•4 tablespoons cocoa powder
• 8 tablespoons whole milk
1. Mix together all ingredients until you have a smooth paste. 2. Spread over a clean face and neck, avoiding the eye and mouth area. 3. Let sit for 15 minutes and rinse well with warm water.
Chocolate Walnut Body Polish
Makes 8 ounces Exfoliate weekly with a body scrub for healthy, glowing skin. This rich recipe, full of natural nut oils, will gently scrub and soften the skin all over your body. In a pretty jar with a big bow, it also makes a wonderful gift. You can find walnut oil at the grocery store in the cooking oil section. You also might want to experiment with other natural nut oils, such as almond and macadamia
. • ½ cup raw sugar
• ¼ cup walnut oil
• 1 tablespoon finely chopped walnuts
• 1 tablespoon cocoa powder
1. Stir together all ingredients until well mixed.
2. Standing in the shower or tub, massage into damp skin, rinse well and pat dry HOT COCOA BATH
Makes 16 ounces, enough for 1 bath Milk baths are classic beauty basics. They are effective because the lactic acid in milk helps soften and soothe the skin. Chocolate milk is equally effective; combined with the power of honey, this yummy bath will refresh your skin. Be extra decadent and sip a cup of cocoa while bathing. It is especially relaxing in the evening before going to bed.
• 2 cups chocolate milk
• 1 tablespoon honey
• 2 tablespoons mild liquid soap
1. Stir together all ingredients.
2. Pour under the running water as you fill your tub.
3. Bathe and relax for 15 to 20 minutes
Chocolate Lip Balm Cocoa Butter Cuticle Cream Cocoa Mint Foot Scrub Chocolate Massage Butter
Janice Cox is the author of Natural Beauty at Home, Natural Beauty for All Seasons and Natural Beauty from the Garden, all published by Henry Holt and Company (New York). For more recipes and ideas, visit her at www.HerbCompanion.com/Contributors.
FULL ARTICLE LINK
Feb 8, 2009
Don't Throw The Styrofoam Away, It's Easy to Recycle
First I should mention that after two weeks, my headaches are gone. Whew! I was starting to get worried there. Now for the main event. Styrofoam. I hate it. We get a lot of things in the mail at home and at my office. At home I tend to reuse the packaging for shipping my own things but once in awhile (say after Xmas) we have a surplus of packing peanuts and possibly some styrofoam blocks from different new appliances, etc... At work the boxes have been piling up because I won't throw the styrofoam away and I know I will need those boxes sooner or later. Well my boss was getting sick of looking at them and I could tell the mess was on his nerves.
So I go on freecycle (and craigslist in the FREE section) for my local area, and post an OFFER to anyone in need of styrofoam blocks and/or peanuts. The thing is, I know that if I wanted to, a lot of shipping stores (like UPS, or Kinkos) will take your peanuts off your hands if you bring them by. Just call them first, usually if there's nothing wrong with them you can just give them to them. But the styrofoam blocks were a problem. I had all these because we recently ordered a new copier and microwave. Beyond that my boss received several bottles of wine packed with styrofoam. Now I keep those little styrofoam (or the now widely used cardboard) bottle-shaped packaging that they make to ship wine with because I know those are handy for sending wine and/or canned goods (really anything bottle/jar shaped). But the rest of those things I probably will not use unless I start making pottery or something like that. Within day I get a response that someone would like to take these off my hands through the freecyle. They picked them up on Friday and voila! Recycled.
Now for the old copier and old microwave I need to get rid of. I won't throw this away either. Too many things that could be reused or repaired in these things. Also who knows what kind of toxic stuff is in these things? I am not putting them in the local landfill so it can seep into our ground water and never biodegrade. We have several used appliance centers that will take your old appliances, repair them and resell them for a low price. Some of these places take your things for free and some charge a small fee for taking certain things (around 15- 20 cents a lb). So I have the hubby load them into my car and I take them to a local appliance recycle center that has recently opened. The copier is OLD and I am pretty sure no one will find another practical use for it, but the microwave could be repaired (the breaker went off it redering it unworkable).
SO there you have it. Not much work, other people want this stuff! And especially your old computer monitors which can contain lead or mercury.
So make sure next time you have to get rid of an old fridge, have too many styrofoam peanuts or want to buy another appliance for a good price, you check these options out and save the planet while you're at it.
- 2.63 Million tons of e-waste was generated in the U.S. in 2005. 2.3 million tons of this e-waste (over 87%) ended up in landfills or incinerators.
- There's more gold in 1 metric ton of recycled computers than in 17 tons of gold ore.
- It takes 530 lbs of fossil fuels, 48 lbs of chemicals, and 1.5 tons of water manufacture one computer.
- 40% of LEAD found in landfills comes from consumer electronics.
Office Depot has an electronic recycle program. Call them for details. Also you can ship to these locations: Costco Trade-In and Recycle Program 866-339-4101 Collective Good Organization (cell phones only) www.collectivegood.com 303-339-4101 Hewlett-Packard Recycling Services 800-340-2445 www.hp.com/recycle/ IBM Asset Recovery Solutions 888-746-7426 WEBSITE Interconnection Mail-In Recycling 866-621-1068 interconnection.org/give_mail.html
Jan 26, 2009
HotDish is Closing up Shop!
I have been thinking about closing this shop for awhile now and I thought I would wait out the holidays just to make sure. But there hasn't been much going on in there. Also I have not been feeling like my crafty self lately which means I do not have the energy anymore to work that hard and spend so much money to make the aprons for so little return. I gave it a try for more than a year so I think I gave it my best. There's lots of aprons out there and I like mine best, but I guess it's all a matter of opinion. I don't have a sweatshop so I can't charge those super low prices I've seen in other shops and I still barely made a profit. So that's it . I am not sure how soon but you all have at least a month before I erase everything. I've dropped all the prices on the aprons to enable you to spend. :)
C'est La Vie!
Jan 20, 2009
Knitting my own "design" sucks!
I am trying to knit a scarf for a friend. I committed to knitting this project about this time last year. I put it off because A. I have AD/HD and i put lots of things off for reasons that are not apparent to me. and B. because I knit him another scarf and the flute tote bag (previously posted) before I started on this one and I thought I had lots of time because I had all summer (during which I didn't knit at all for anyone). I thought this project would be easy because basically it's a scarf with big blocked letters on it. Only two colors, shouldn't be that difficult right? wrong. I don't know something about matching the letters to make sure they are all proportionate is making me fussy. I've already frogged a letter out once and I am starting over again. It's the letter "A" and I can't get it right. Not to mention this scarf is a huge pain in my ass cause it's all about spools everywhere and I didn't realize that when I said I would make it. I've never done that before, and it's a mess! I am just learning as I go. Which may mean there is a much easier way to do this and I will not know until I spend a year trying to knit this thing.
Now I keep finding reasons why I cannot work on it, like I am too busy having fun on the weekends, etc... but I have 14 MORE LETTERS TO GO!!!!!!! Holy crap I will never get this done.
You are welcome to tell me any info you know to make this easier. I'm already using clothespins for spools..... oh and I cannot disclose what it says, it's top secret for now.
Jan 11, 2009
Pho King & Queen :)
Well I haven't posted a lot lately. Too distracted with all these crappy holidays and weird weather we are experiencing in my part of the world (avalanches, mudslides, floods, snow, etc..). Thought I would share with something Jarrod and I have been making a lot of lately.
Pho soup, if you never had it, you must try it. I would suggest getting some at your local vietnamese restaurant before venturing into the process it takes to make this wonderful deliciousness yourself. You need to taste it to know what it's supposed to taste like! But if you try it and you like it as much as we do, you may be saving yourself some serious moola by making your own. Not to mention all the garbage that comes with the take out order, that is what motivated us (though I supposed you can bring your own containers when you order it to go, just make sure you have a couple big ones).
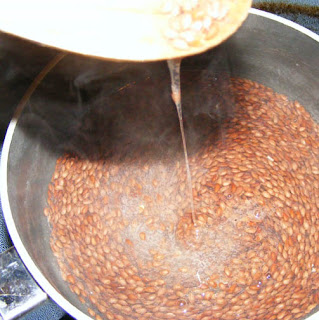
We started with our turkey carcass from Thanksgiving. The usual would be to use a chicken, but hey it doesn't really matter. Pho lends it's beautiful flavors to all sorts of meats so use what you like. You can make a vegetarian version of this but I honestly don't think it will taste the same (good maybe though) and I really like vegetarian as often as possible but this just doesn't seem the same without the stock.
If you do go the veggie route I recommend getting some broth like Imagine's "No Chick Broth" or just one of your favorite broths and using 1 part broth to 1 part water to get the flavor right before you add the other spices and such. Also try tofu in it or better yet, fried tofu. I've adapted a few recipes to create this one. After you have made it a couple times, you will want to adjust the seasonings to your own taste. Add more coriander, or less anise, more dish sauce, less sugar, whatever you prefer.
Pho is pronounced "fuh" though if you read it like it's spelled most people will know what you are talking about. The most typical, basic pho is made with beef, but since I don't eat beef this is the version we make, Pho Ga. I sometimes like to grill shrimp or scallops (amd slice the scallops when they are done) and then throw them in with the chicken or just use the seafood as the protein. My husband doesn't like seafood in his soup though so it's usually a mix for me. I think the seafood is delicious in it.
This will make a lot of broth. If you end up with a lot leftover (which I recommend making enough for leftovers- double it) you can store the broth in the freezer and anytime you want more it's that much faster. You can buy stock, but it won't be the clear enough (and will have other ingredients) to be the best for pho. To get it "right" you need to make your own and strain it.

Pho soup, if you never had it, you must try it. I would suggest getting some at your local vietnamese restaurant before venturing into the process it takes to make this wonderful deliciousness yourself. You need to taste it to know what it's supposed to taste like! But if you try it and you like it as much as we do, you may be saving yourself some serious moola by making your own. Not to mention all the garbage that comes with the take out order, that is what motivated us (though I supposed you can bring your own containers when you order it to go, just make sure you have a couple big ones).
We started with our turkey carcass from Thanksgiving. The usual would be to use a chicken, but hey it doesn't really matter. Pho lends it's beautiful flavors to all sorts of meats so use what you like. You can make a vegetarian version of this but I honestly don't think it will taste the same (good maybe though) and I really like vegetarian as often as possible but this just doesn't seem the same without the stock.
If you do go the veggie route I recommend getting some broth like Imagine's "No Chick Broth" or just one of your favorite broths and using 1 part broth to 1 part water to get the flavor right before you add the other spices and such. Also try tofu in it or better yet, fried tofu. I've adapted a few recipes to create this one. After you have made it a couple times, you will want to adjust the seasonings to your own taste. Add more coriander, or less anise, more dish sauce, less sugar, whatever you prefer.
Pho is pronounced "fuh" though if you read it like it's spelled most people will know what you are talking about. The most typical, basic pho is made with beef, but since I don't eat beef this is the version we make, Pho Ga. I sometimes like to grill shrimp or scallops (amd slice the scallops when they are done) and then throw them in with the chicken or just use the seafood as the protein. My husband doesn't like seafood in his soup though so it's usually a mix for me. I think the seafood is delicious in it.
This will make a lot of broth. If you end up with a lot leftover (which I recommend making enough for leftovers- double it) you can store the broth in the freezer and anytime you want more it's that much faster. You can buy stock, but it won't be the clear enough (and will have other ingredients) to be the best for pho. To get it "right" you need to make your own and strain it.

Subscribe to:
Posts (Atom)